
Product Support
How to Set Up Your Water Pitcher
Instructions
STEP ONE
Wash the pitcher
Hand-wash* pitcher, lid and reservoir. With clean hands, flush filter with cold water for 15 seconds. Rinse well.
*Do not wash in dishwasher. Do not use abrasive cleaners.

STEP TWO
Determine pitcher type
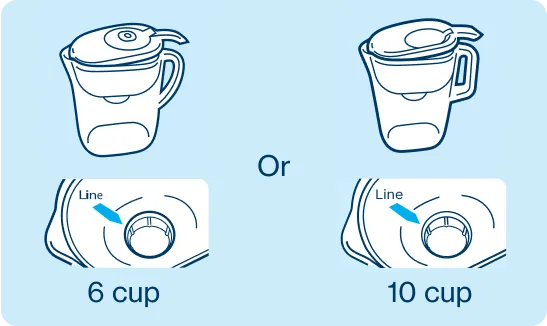
Review your pitcher lid type to determine if you have a 6-cup or 10-cup pitcher. Once confirmed, remove lid and insert filter below line to seal.
STEP THREE
Insert the filter
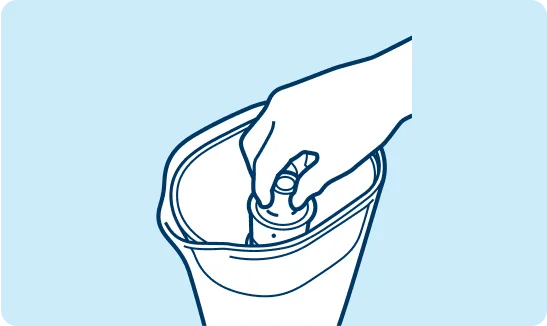
Press firmly to ensure the filter is secure.
STEP FOUR
Set replacement reminder
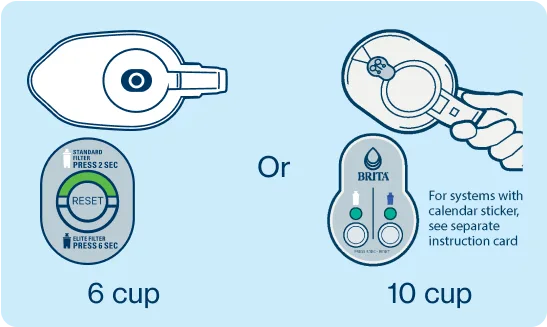
6 cup: To set the filter life status indicator, press the RESET button and hold it down for 2 seconds, until a green light on the top half circle blinks three times*. *For systems without an electronic indicator, refer to the filter replacement reminder instructions included on the back of the filter reminder sticker.
10 cup: Turn lid over to access filter indicator reset panel. For this Brita™ Original(Standard) filter (white), push the button below the white filter. Hold for at least 5 seconds to start. NOTE: Light will flash 3X to confirm.
STEP FIVE
Check filter status
Once set, the light on top of the lid will pulse every time you pour.
Green: No change needed.
Yellow: You’ve filtered 35 gallons (132 L), replace filter soon.
Red: You’ve filtered 40 gallons (151 L), time to change filter.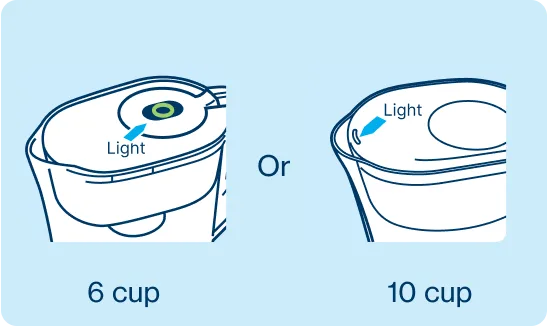
STEP SIX
Fill it up
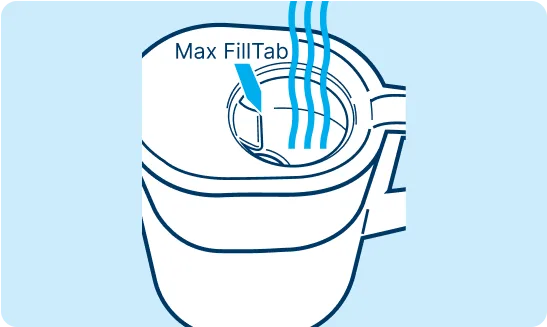
Open the lid and fill the reservoir with cold tap water*. Discard the first 3 pitchers of water, or use to water plants. Please note that the system indicator will only count a reservoir fill if the lid is open for at least 10 seconds.
*Hot water shouldn’t be used with the Brita™ Original (Standard) filter (Max. 85°F/29°C – Min. 32°F/0°C).
See Performance Data Sheet Original (Standard)
Pitcher FAQs
See all FAQsElite™ (Blue) Filter:
- Insert the filter into the reservoir by lining up the groove in filter with the ridge in the pitcher’s reservoir. Press firmly to ensure a tight seal.
- Add cold tap water. Discard your first three containers worth of filtered water. (Or, use it to water plants!) It’s normal for carbon dust to appear in your first few fillings.
- Replace filter as recommended to maintain optimal performance.
Original(Standard) (White):
- Flush your filter with cold water for 15 seconds.
- Insert the filter into the reservoir by lining up the groove in filter with the ridge in the pitcher’s reservoir. Press firmly to ensure a tight seal.
- Add cold tap water. Discard your first three containers worth of filtered water. (Or, use it to water plants!) It’s normal for carbon dust to appear in your first few fillings.
- Replace filter as recommended to maintain optimal performance.
How to change your Stream (Gray) Filter:
- Flush your new Brita Stream® Filter with cold water for 15 seconds.
- Insert filter into filter cage with blue ring facing up. Press filter until it clicks.
- Install filter cage onto lid with a firm twist.
- Activate electronic indicator, fill pitcher and enjoy great-tasting water.
Brita™ pitchers are easy to maintain. Hand-wash the pitcher/dispenser, lid and reservoir periodically with a mild detergent—never with abrasive cleaners—and rinse well. Always remember to remove and set aside filters before washing.
When reassembling your pitcher after cleaning, be sure to correctly reinstall your reservoir and lid. The reservoir has a vent hole in the area that holds the filter. Make sure the vent is facing the back of the pitcher. For lids, the Fill Lid feature should be positioned toward the back.- Brita™ Filter User Guide (Elite Filter, Shasta Indicator)
- Brita™ Filter User Guide (Original(Standard) Filter, Shasta Indicator)
- Brita™ Filter User Guide (Elite Filter, SmartLight Indicator)
- Brita™ Filter User Guide (Original(Standard) Filter, SmartLight Indicator)
- Performance Data Sheet for Brita™ System with Elite Filter


